
Smart Ease is a Premiere Pro feature. It is not available in DaVinci Resolve.
Quick Start
1
Open Smart Ease
On the PremiereGPT home screen, click the Smart Ease tile (curve icon).
2
Choose a mode
Animate adds a new animation to your clips. Ease keyframes puts a new curve on keyframes that are already there.
3
Pick an animation
Hover the cards to preview each motion, then click the one you want.
4
Adjust
Choose Where the animation plays, its Duration, its Curve and its Intensity.
5
Choose the clips
Select clips in the timeline and keep Selected, or pick Track or All clips.
6
Apply
Click Animate N clips. Not happy? Click Undo in the panel and try another preset.
Two modes
Animate
Adds a ready-made animation to each clip: 8 built-in presets, your own presets, or an animation written by the AI.
Ease keyframes
Keeps your keyframe values and only changes the timing between them: slow down, overshoot, bounce, or your own Bezier curve.
Animate
1. Pick an animation
Each card previews its motion when you hover it, and the selected card keeps looping. The small curve in the corner shows how the move speeds up and slows down.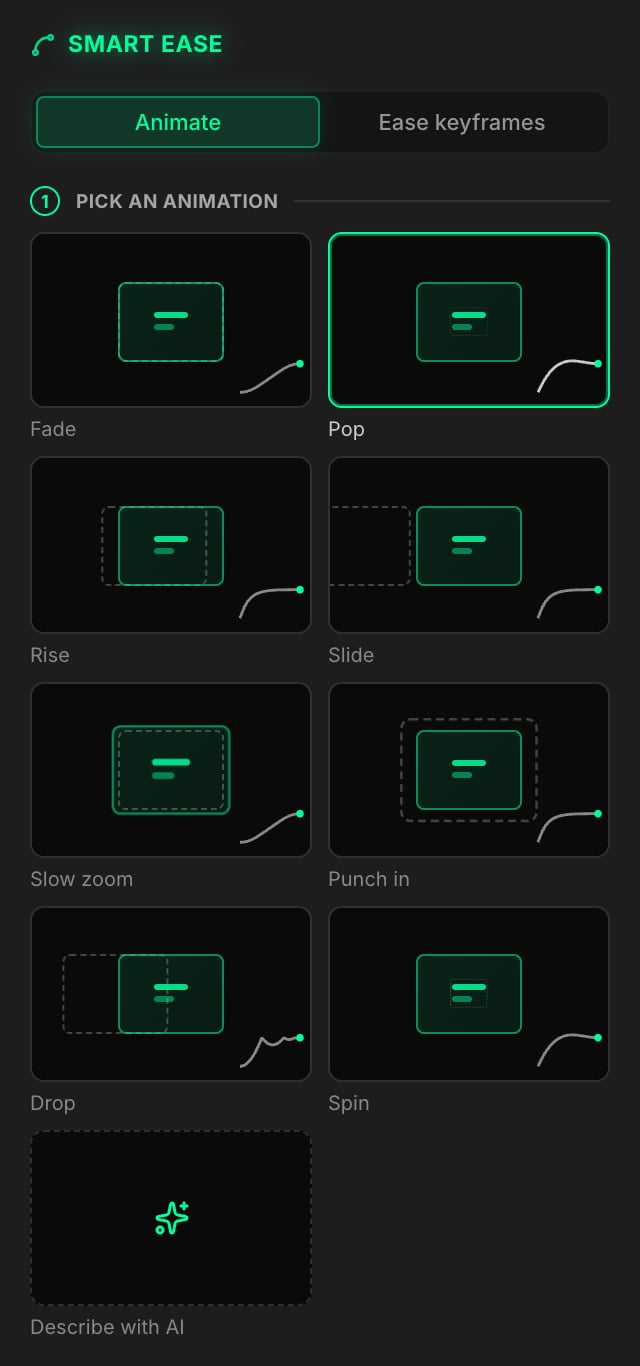
The last card, Describe with AI, lets you create a new animation from a sentence. See Describe an animation with AI.
2. Adjust
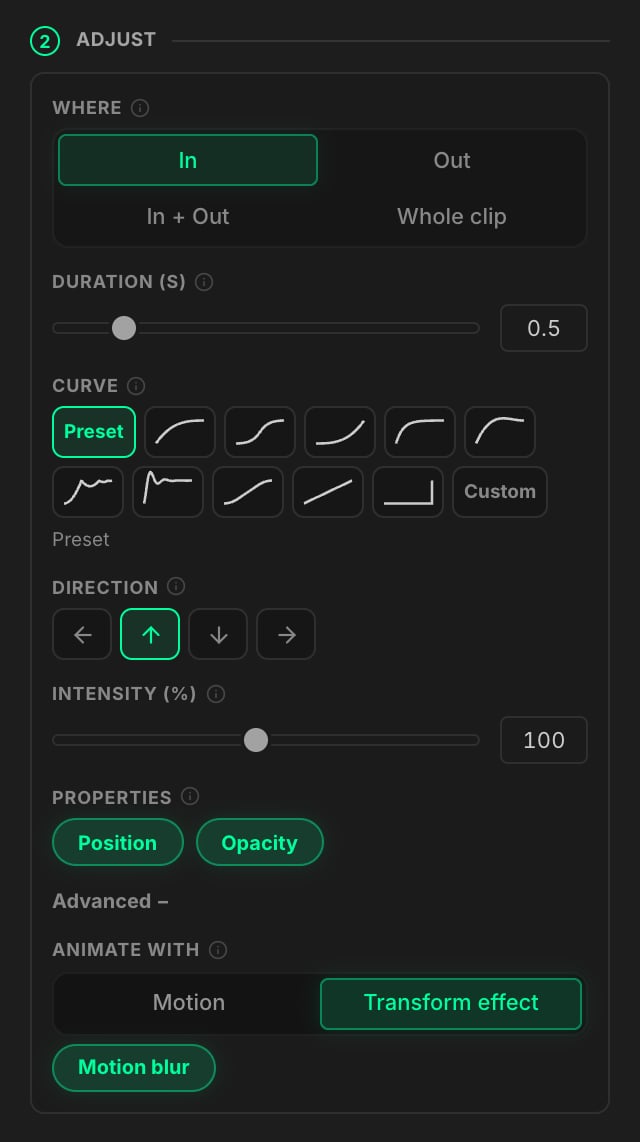
Settings that do not apply to the selected animation are hidden.
Curves
With Custom, drag the two handles of the Bezier editor, or paste a value such as
cubic-bezier(0.33, 1, 0.68, 1) in the field below it. The field uses the CSS cubic-bezier() format, so you can paste values from easing websites.
Advanced: Animate with
Click Advanced to choose which transform the animation drives:How keyframes are written
- Smooth (native) and Linear write just two keyframes with Premiere’s own interpolation. They stay easy to edit by hand in Effect Controls.
- Eased curves such as Slow down, Snappy, Overshoot, Bounce, Elastic or a Custom curve are written as one keyframe per frame. Premiere does not give scripts access to Bezier handles, and every easing plugin works this way. This makes the exact curve play back identically in Premiere.
- Values are relative to the clip’s current state. Its position, scale, rotation and opacity are respected: Pop scales up to the clip’s own scale, Slide lands on the clip’s own position, and so on.
- Re-applying replaces what was there. A new animation replaces the keyframes in the animated range (the In or Out window) on the checked properties, including another preset’s keyframes. You can try presets one after another on the same clips.
Ease keyframes
Use this mode when your clips already have keyframes, made by hand, by another tool, or by Smart Ease, and you only want to change how the motion feels.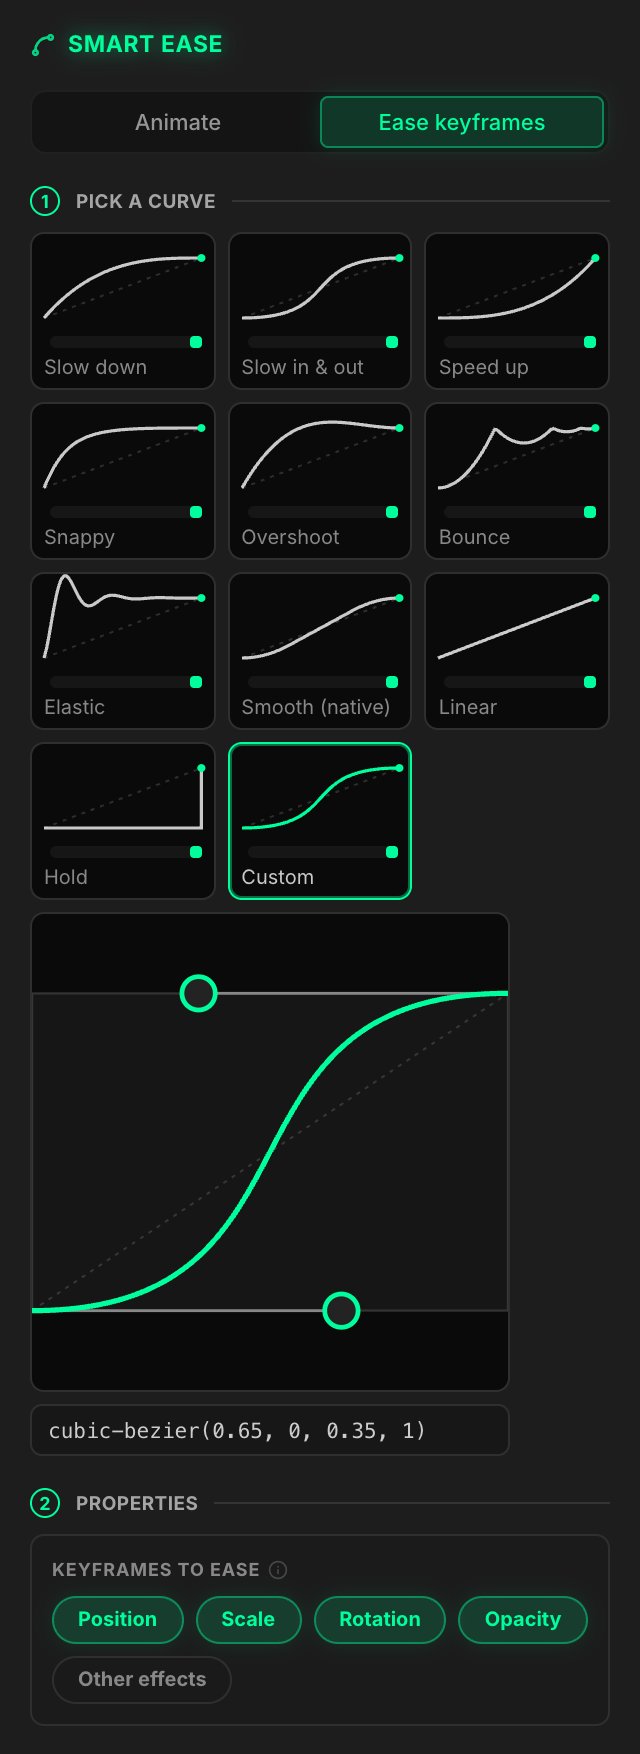
1
Pick a curve
Click Ease keyframes at the top, then pick a curve card. Hover a card to watch it: a dot travels the curve and a small runner shows the speed. Choose Custom to draw your own curve or paste a
cubic-bezier(...) value.2
Choose the properties
Under Keyframes to ease, check Position, Scale, Rotation, Opacity and, if needed, Other effects (any other keyframed number on any effect, such as a blur amount).
3
Apply
Choose the clips, then click Ease N clips.
- Every pair of consecutive keyframes on the checked properties gets the curve. Your values do not change, only the timing between them.
- An animation made by Smart Ease counts as one move, from its first to its last keyframe. You can switch its curve again and again.
- A Position that follows a curved motion path keeps its path. Only the timing changes.
- It works on the Motion, Opacity and Transform effects, so it also re-eases the zooms made by AutoZoom.
Apply to your clips
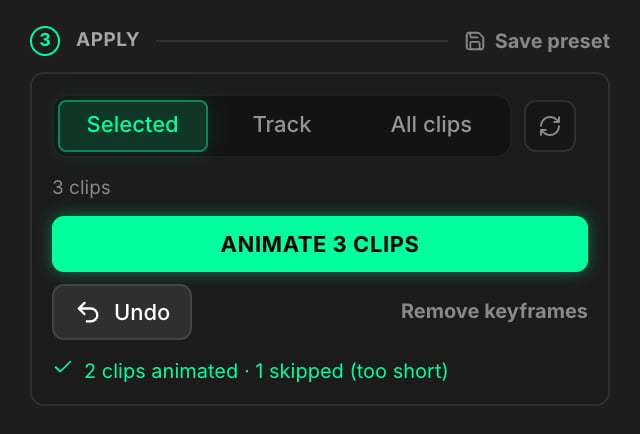
The panel shows how many clips will be processed. The refresh button re-reads the timeline. Smart Ease also re-reads it when you come back to the panel, so you can change your selection in Premiere and return.
Click Animate N clips (or Ease N clips). Large timelines are processed in batches, with a progress counter on the button. When it is done, a line sums up the result: how many clips were changed, and how many were skipped and why.
Undo and remove keyframes
- Undo puts the clips back as they were before the last apply. Keyframe values are restored. The interpolation of restored keyframes comes back as linear.
- Remove keyframes removes all keyframes of the checked properties on the chosen clips. Each clip keeps the value it had at the middle of the clip. You can undo it with the panel’s Undo button too.
Save your own presets
Click Save preset at the top right of the Apply step and give it a name. A preset stores all your current settings, including a custom curve or an AI animation, in your local PremiereGPT preferences.- Animation presets appear as cards under My presets.
- Presets saved in Ease keyframes mode appear among the curve cards.
- To delete a preset, click the × on its card.
Describe an animation with AI
Need a motion that is not in the gallery? Describe it.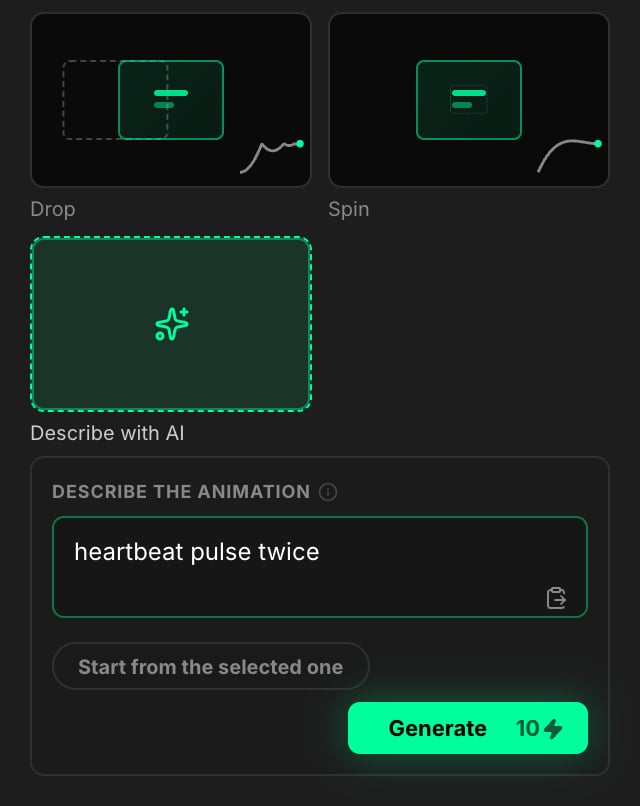
1
Open the AI box
Click the Describe with AI card.
2
Describe the motion
Write what you want, in any language. For example: “drop in from the top with a soft bounce”, “heartbeat pulse twice” or “earthquake shake for an impact”.
3
Generate
Click Generate. After a few seconds, a new card with an AI badge appears, already selected and ready to apply or to save as a preset.
Credits
AI credits are charged only when an animation is actually produced. Once generated, applying it or saving it as a preset is free.