
Quick Start
The panel is organised in three numbered steps: Settings → Preview → Apply to timeline.1
Open the tool
Open the Tools Menu (bottom left) and select Jump Cut.
2
Place the playhead
Put the playhead over a representative part of your sequence — one containing both speech and silence.
3
Preview (free)
Click Preview. A 15-second sample is analysed and drawn as a waveform: everything shaded red will be removed.
4
Tune the sliders
Move the sliders and watch the red zones update instantly — no re-analysis needed. Press play to listen to the sample.
5
Apply
Click Create Jump Cuts. Your sequence is backed up automatically before anything is cut.
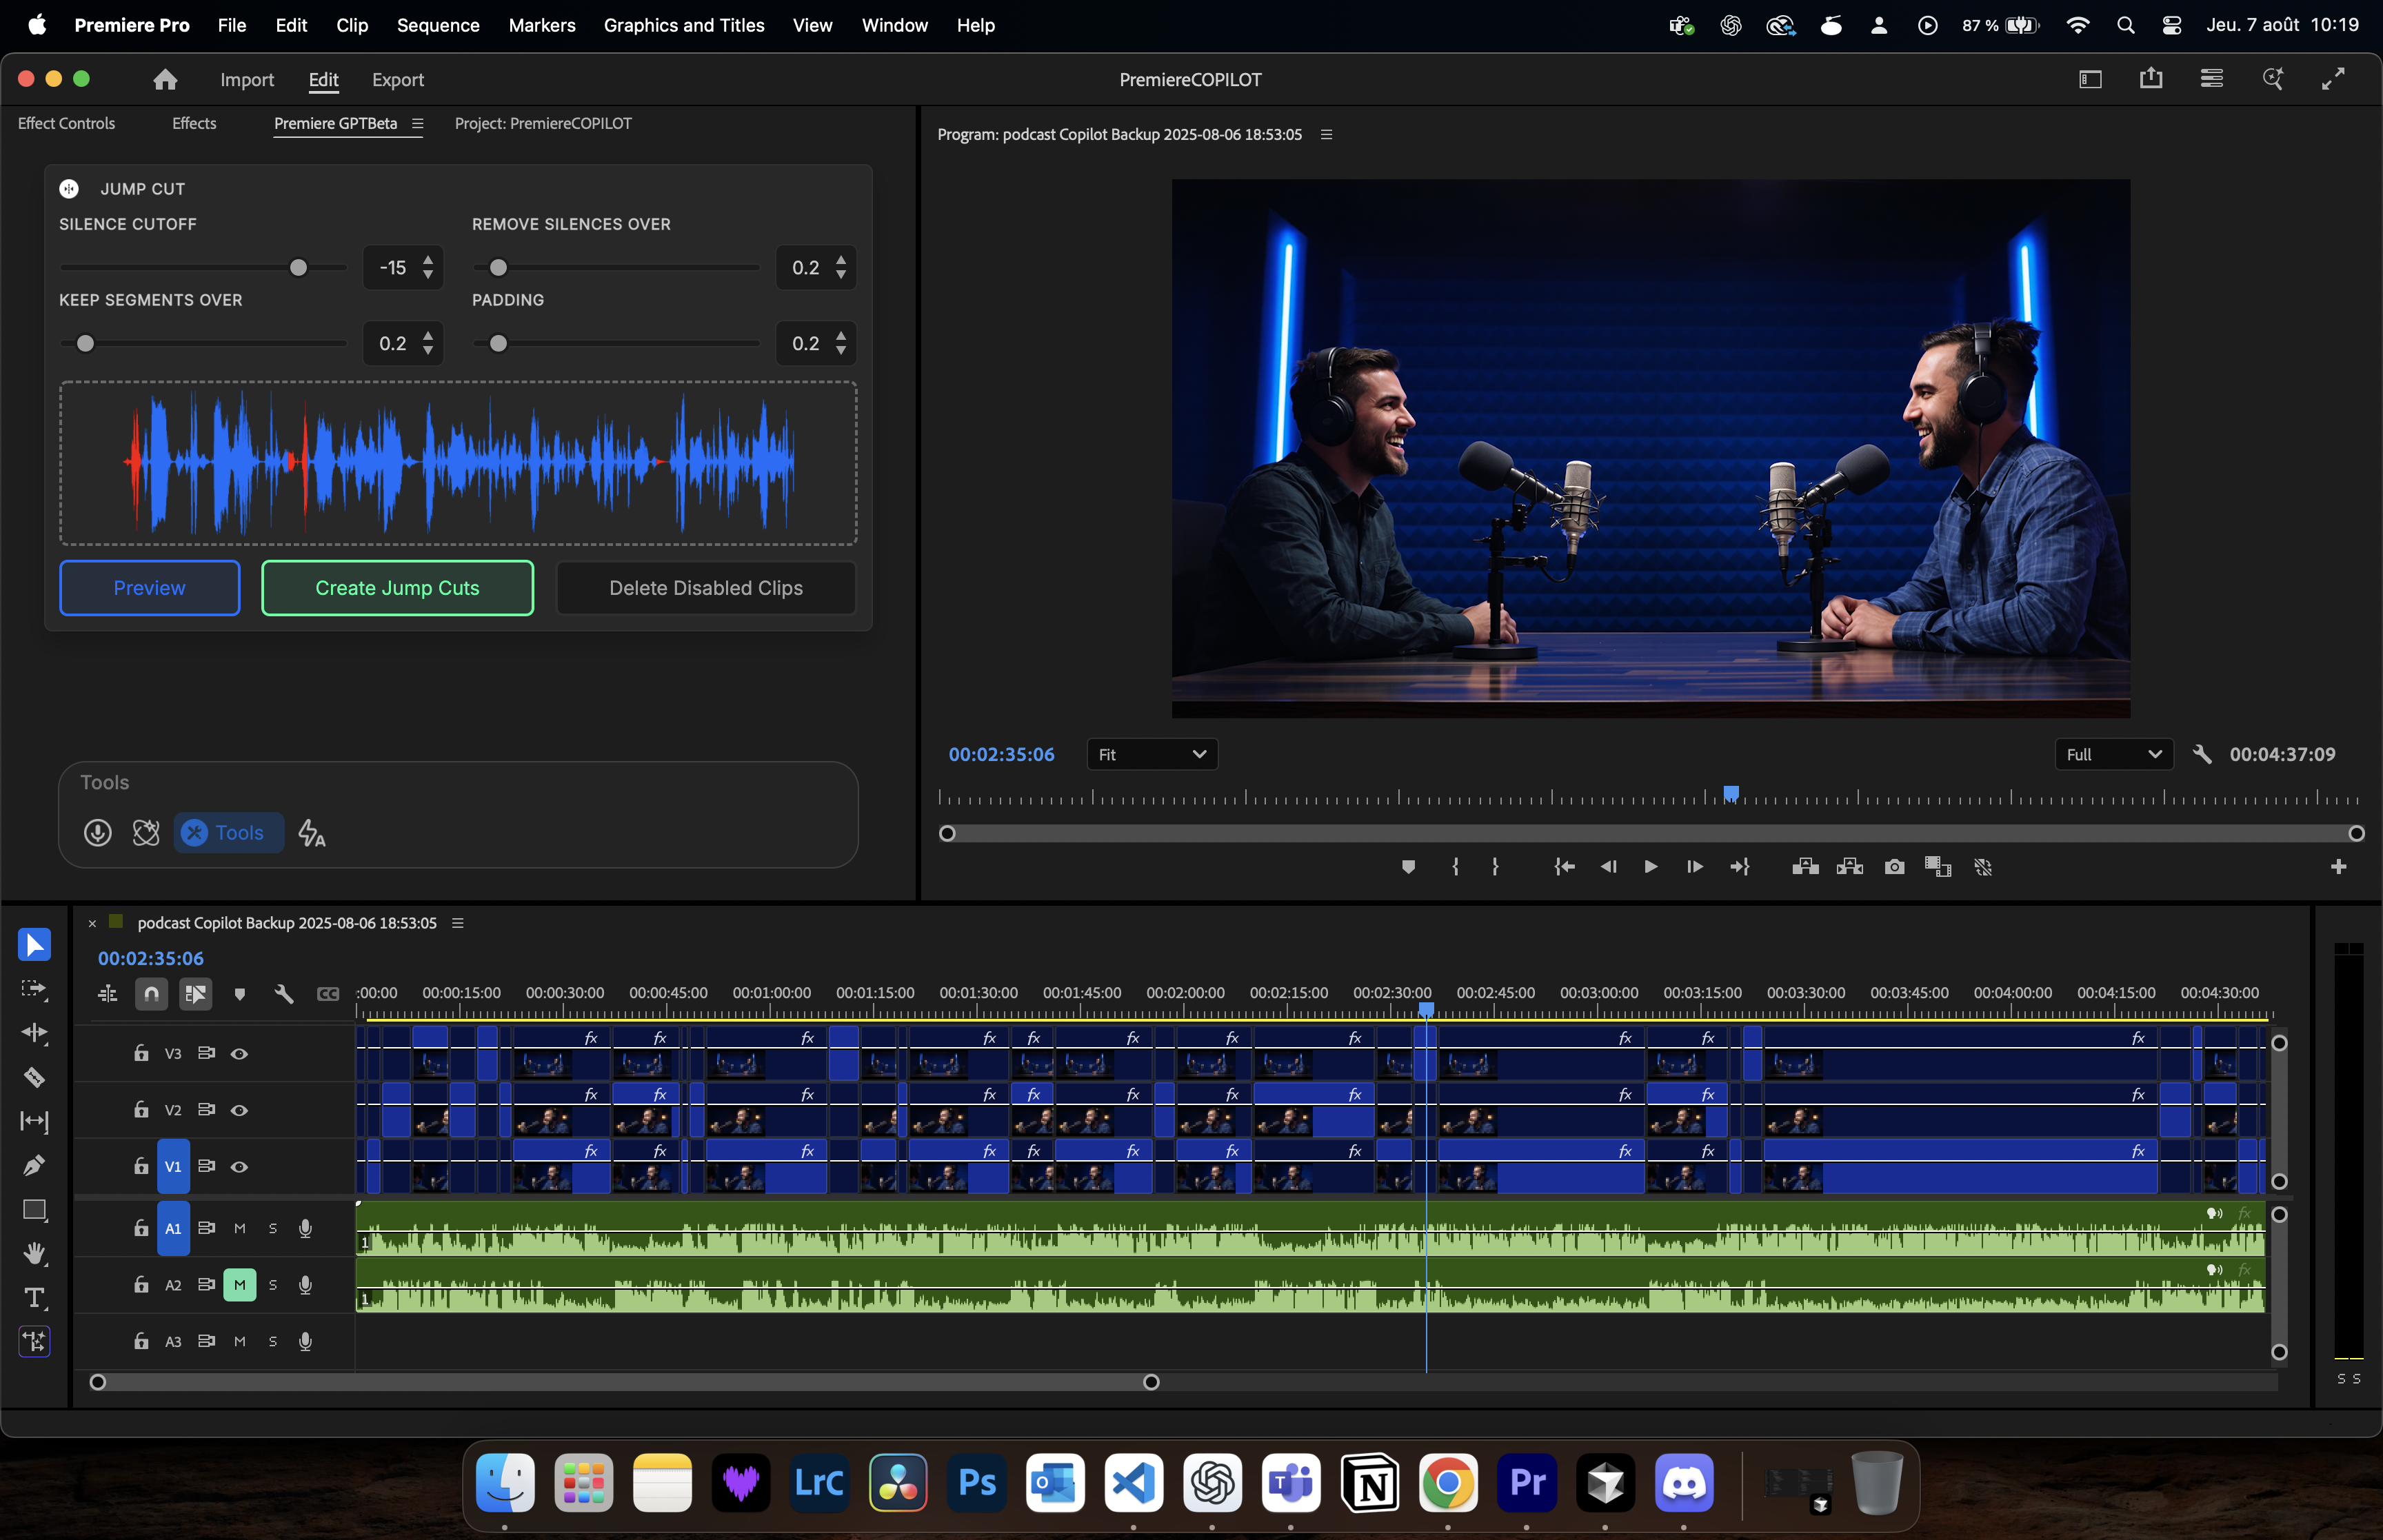
Step 1 — Settings
Voice Sensitivity replaces the old “Silence Cutoff” (dB) setting. It is no longer a volume threshold: the tool detects voice, so background noise, room tone or music no longer count as “not silent”. Higher value = stricter = cuts more.
Voice Sensitivity
- 0.10 – 0.30 — very permissive. Keeps whispers, soft-spoken delivery, ASMR, quiet interviews. Use when the tool is eating the beginning of your words.
- 0.40 – 0.60 — balanced. Standard talking-head, podcast, tutorial. Start here.
- 0.70 – 0.90 — strict. Cuts aggressively; useful in noisy rooms, with air conditioning, street noise or a loud music bed where the detector is too generous.
Remove Silences Over
The minimum length a silence must reach before it’s worth cutting.- 0.10 – 0.20 s — very tight, machine-gun pacing. Great for social/vertical edits.
- 0.30 – 0.60 s — natural rhythm. Removes the dead air but keeps the breathing room of speech.
- 1 s and above — only removes the long pauses. Good for interviews where the silences carry meaning.
Keep Segments Over
Anything shorter than this is not considered real speech: a lip smack, a click, a door, a cough between two sentences. Raise it if isolated noises are kept as tiny orphan clips; keep it low if you have short interjections (“yes”, “no”, “hm”) that must survive.Padding
Padding gives each kept segment a bit of air, so cuts don’t feel surgical.- Positive values (0.05 – 0.30 s) — the usual case. Extends each segment on both sides.
- 0 — hard, immediate cuts. Maximum tightness, harsher listening.
- Negative values (down to -1 s) — shrinks the kept segments, cutting into the speech. Only for very aggressive stylistic edits — it will clip words.
Presets
The preset bar at the top of Step 1 saves your whole slider configuration under a name and reloads it in one click. Build one per format — Podcast, Reels, Interview — instead of re-tuning every session.Step 2 — Preview
The preview analyses a 15-second sample taken at the playhead and is free — it doesn’t consume credits, so you can run it as often as you like.Read the waveform
Blue = kept. Red overlay = removed. The picture reflects your current sliders in real time.
Listen to it
Hit the green play button, or click anywhere on the waveform to jump there and audition the passage.
Moving a slider after a preview does not require a new analysis — the cuts are recomputed locally and instantly. Only click Preview again if you move the playhead to a different part of the sequence.
Step 3 — Apply to timeline
1
Create Jump Cuts
Analyses the whole sequence and applies the cuts. A backup of your sequence is created automatically beforehand, so you can always go back.
2
Delete Disabled Clips (Premiere Pro)
Jump Cut disables the silent clips instead of deleting them, so you can review the result. Click Delete Disabled Clips to remove them and close the gaps.
3
Or automate it
Tick the checkbox on that same button to auto-delete at the end of every run.
On DaVinci Resolve, the Delete Disabled Clips control is hidden — and that’s expected. Resolve rebuilds a new timeline containing only the kept segments, so there is nothing left to delete.
From the Copilot
You can also just ask in the chat:“Remove the silences from my sequence.”The Copilot runs the same engine with sensible defaults. Use the panel when you want to see the waveform and dial the pacing in yourself.